Look at how cute my kids are.

Look at this deep, dangerous, uncovered window well.

Look at my cute kids stuck in the window well.

(Dramatization)
Look at the window well covers I made to prevent the above simulated event from actually happening.

Look at my cute kids eating the ice cream cones I used to bribe them to go down into the scary window wells (after I promised them I'd killed all the bugs and removed the spider webs). Note the smiles on their faces - no visible sign of long-term emotional scars from being coerced by their father to be placed down a deep, previously-bug-infested hole in the ground.

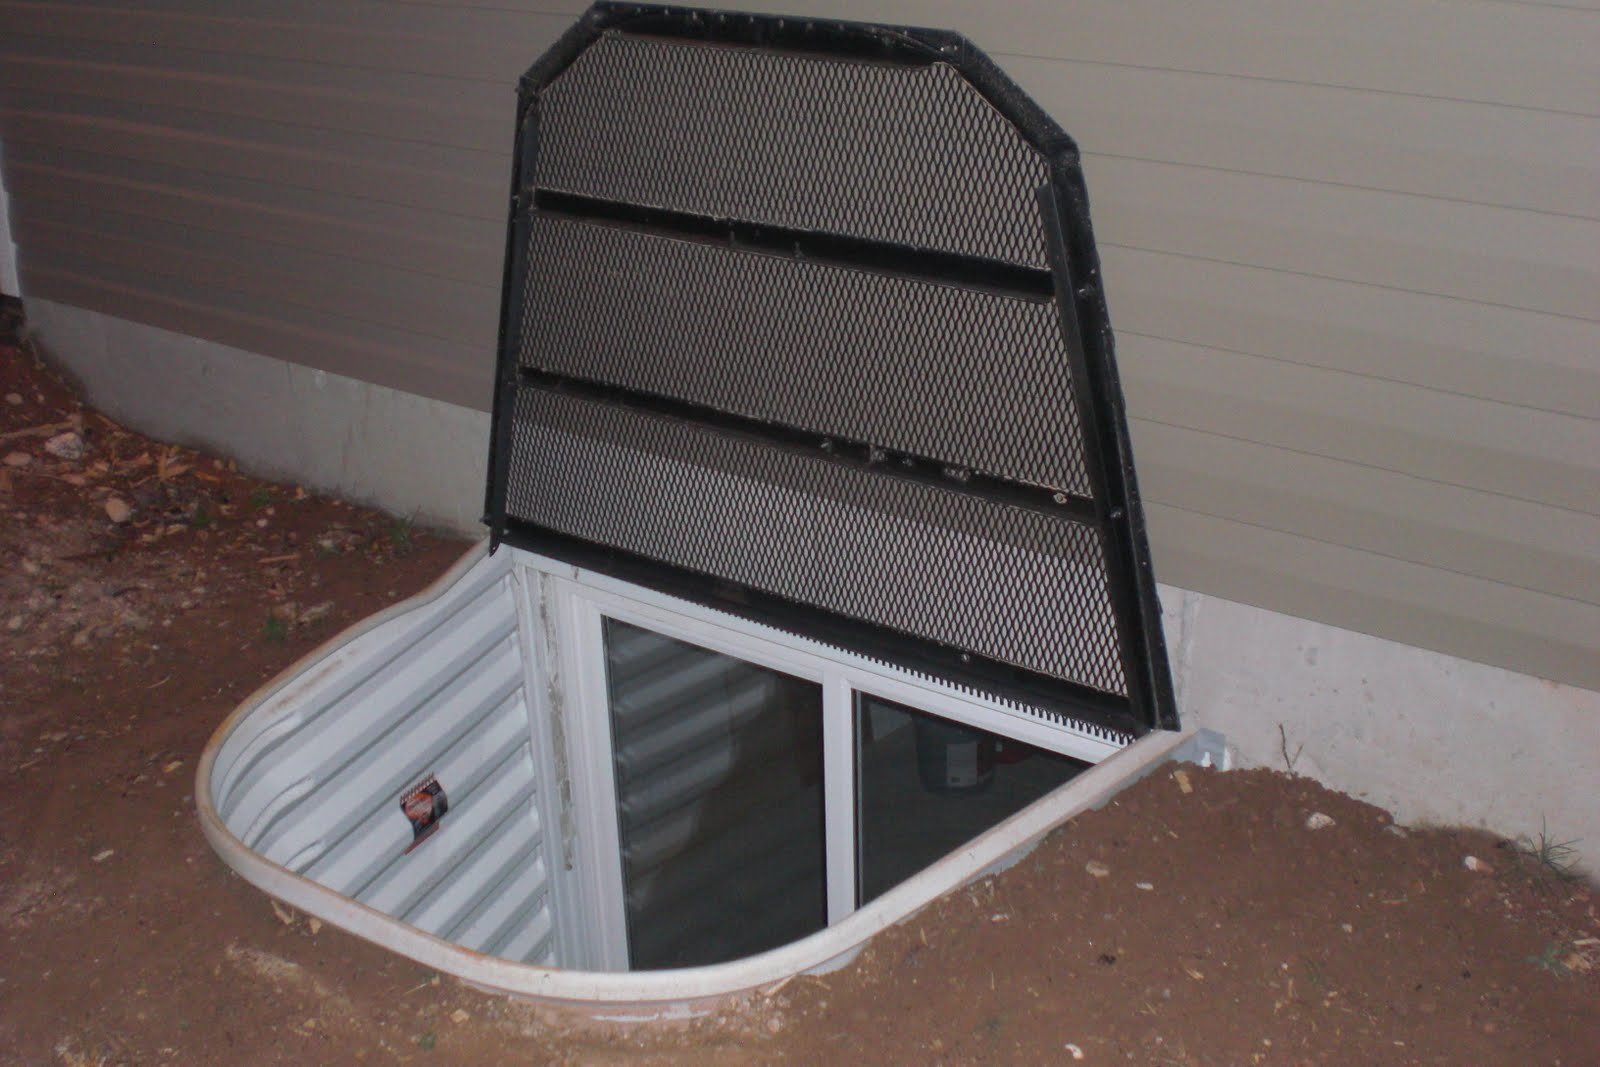
This was one of the first projects I took on once we moved into our new home. Toren couldn't resist throwing rocks at the bugs that get trapped down there, which made me a bit paranoid about him falling down or breaking a window. When I started looking around for window well covers, I balked at the prices being charged on the market ($130 and up, so at least $520 for all four that I'd need). On the other side, I didn't want to settle for just laying down a piece of particle board, so I started looking for a solution somewhere in the middle. I ended up making the frames out of angle iron (used bedframes from D.I.), but needed a way to cut them, so of course I just had to buy a grinder ($45 at a local pawn shop).

Since I don't have a welder, I decided to attach all the pieces with machine bolts. One of the more time-consuming tasks was drilling the holes in the angle iron with my cordless drill. I went through more than a couple drill bits.

I was originally going to cover the frame with plexiglass, but to get enough of it that was thick enough to support someone standing on it would have brought the cost well above the $520 I was trying to beat, so I went with expanded metal mesh - still the most expensive part of the project, but it still lets in plenty of light to the basement and I don't have to worry about the covers breaking when the kids play on them (and they do play on them).

(Can you guess which one craves the attention and which one is still more interested in the bugs down in the window well?)
Materials:
Expanded metal (Two, 4x8 sheets) - $148
Angle Iron (Bed Frames) - $45
Drill Bits, cutting wheels - $24
Nuts, bolts, washers, & other incedentals - $39
Rubberized spray (to make them look nice and to prevent rust) - $31
Total Cost: $288 ($336 if you count the grinder), or $72 each ($84 each if you count the grinder).
Time: I can't remember, but it was a lot - probably the equivalent of three full weekends non-stop.
After making my own window-well covers and understanding the time and materials that go into them, the $130-per-cover price doesn't seem so outrageous anymore. Would I do it all over again? Probably, but only because I got a power-tool out of it...

(I just had to stick these pictures in. We were trying to get them to act scared. Ayda got it down pretty good for that one shot - or it could have just been the large stink bug rising up from the dead that did it for her...)
Haha! Love the post. And what cute models you used to demonstrate your new product. :) Wanna make some for us too? ;) I seriously wish we lived by you guys.
ReplyDeleteThese are awesome. We've been procrastinating the window well covers because of the expense, but seeing this post it's tempting to find the time and get some made for our's.
ReplyDeleteI think this is an informative post and it is very useful and knowledgeable. therefore, I would like to thank you for the efforts you have made in writing this article. Utah Window Well covers
ReplyDelete